- Cleaning everything before using:
First thing you must do in setting up the tank is to clean everything. Driftwood should soak for at least 2 to 3 days. Rocks should also soak and be cleaned. Soak and clean all gravel being used. Gravel should be soaked in a bucket to remove all dust and dirt. Even if it is already pre-washed it should be re-washed. I plan on soaking my Flourite for a day then run with it in a colander for awhile. Take a paper towel and wet it and clean out the inside of the aquarium tank. Through none of these steps ever use any household cleaners. Even if cleaner says mild. Warm water is the only thing to use or cleaner from the pet store that is especially made for aquarium use. Always read the directions carefully. Chemical residue will harm or even kill your fish. Clean all covers, filters, and equipment that will be placed in the tank.
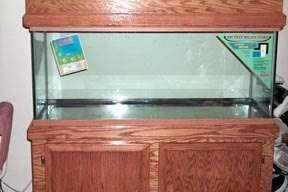
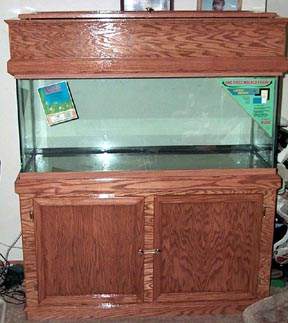
- Find a spot where the tank will be kept: This is very important. As you are aware of by now any tank over 10 gallons is very heavy. You do not want to move this if at all possible. Find a place in your home that is near an a/c supply. Running extension cords can be messy and a hazard to you and your fish. Most equipment with the exception of the heater do not use high current so extension cords can be used but if cords are in high traffic areas someone could trip or the plug could be kicked out and pumps and heaters will not be on. Also you should select a place in your home not near a window. Windows can be drafty in the wintertime and in the summer sun water can heat up quickly. These severe temperatures can also harm your fish. Drafty areas should also be avoided such as windows or doors that lead to the outside. Also the place you place the tank should not be placed in a heavily traffic area. Check to see if the floor around the area can support the weight you will place on it. Make sure also that the area or floor is level. Uneven floors will place more pressure on the sides of the tank or stand and could collapse either. The use of a level will tell you if the tank is level. Never use a wedge or something under tank to compensate for the unevenness of the tank. This will put to much pressure on the area being wedged and could cause the tank to crack. If your tank doesnt have a frame around it a piece of Styrofoam about ¼ inch should be placed between the stand and the tank to distibrute the weight evenly. After you have found your spot place your tank down on the stand and your ready to start.
-
Now your ready to start the tank:
Place in your under gravel filter (if you are using one I will not be using one with mine). Next put in the gravel (or if your are doing as me put in a 1-2 inch of sand first). (Note: if you are using a under gravel filter real plants will not do as well. Also sand can not be used with an undergravel filter. This will clog up the undergravel holes and kill your biological filtration by not allowing water to flow through the gravel!) Next if you are doing as me place your Flourite or gravel in. You should place in at least 2 inches of gravel in (if sand is not being used 4 inches of gravel should be used). This should be tapered 1-3 inches in front to 3-6 inches in the rear. Looking from the side of the tank the gravel should go uphill from front to back.
- Placing bottom equipment:
Now that your gravel is in you should try placing your heater in if it will be underwater as mine is. If it will not be underwater skip the first part of this section. Place the heater in an area that you think will have water circulation. Also be sure not to place heater on or to near gravel. Placing on gravel could cause heater to break the glass and cause all kinds of problems. About 1-3 inches from gravel is a correct placement. Place heater horizontal across tank. This will provide the best heating position. Next place Box Filters. I am going to try to disguise these as best as possible. But dont place in an area that will be to difficult to do periodical cleaning of it by covering up to much it can not be accessed. Next place the Canister filter lines. I will place my rain bar up near the top and the intake on the left side as you face the tank. With all these maintenance items in place we are ready to move on to the next section.

- Placing of the rocks and driftwood:
Next we will start by placing some of the driftwood. We are going to have bottom dwellers and we need hiding places for them. Try to think ahead for the future and make as many hiding places as possible. Safe havens for Plecos, Cory cats, Loaches and other bottom dwelling fish is a must. These fish are nocturnal and like to sometimes hide during the day. I will also save some of my sand to make a few sand piles for the Corys and other fish that like to play in it. You have to read about the fish you wish to keep and what their habits and likes are. After the driftwood is placed we will move on to rock placements. I will build a few caves at the bottom of the tank and in spots build upward as to have hiding places for fish that occupy the middle and top strata. Make sure that your rock placements are secure! You dont want your fish being caught in an avalanche and getting hurt. Plecos love to suck on the under side of rocks holding themselves upside down. They move off and on the rock defending their area and loosely set rocks could be devastating to them. Also they are not real graceful and are very clumsy. Build as many caves nooks and crannies as possible. If you plan on getting shy fish or get a fish that is frightened these caves and hiding spots will make them feel secure and healthy. A frighten fish will hide in corners not eating and get sick. This could get the whole community sick. Hiding places make them feel secure and let them come out feeling if things get to rough I have this hiding place to go to. After rock placements are complete we are ready for the next phase.
- Filling the tank:
Now that we have all of our newly formed world setup we are ready to put in the water. Note: If you plan on putting in decorations such as castles or bubble devices (opening treasure chests etc.) you can do so before this step. Place a pie pan or bowl or some object that will deflect the water you are pouring into the tank. Pouring water directly into the gravel or on a rock cave could knock them over or move the gravel around to areas you dont want it. Put holes and craters in your gravel. Placing a bowl or pie pan in the tank will distribute the water more evenly and avoid these problems. Remember also that the water you put in should be measured if conditioning drops are not added to the water first. I will use a rinsed out gallon milk jug and will add the conditioning to it before pouring into the tank. This way I will not have to remember how many I put in. Remember also that because you have a 75-gallon or 55-gallon tank or whatever size you are using that is not how much water that will be put in! First of all manufacturers of tanks rate their tanks to the nearest 5 gallon size. For my tank I believe it is around 78.5 gallons. My tank is 48 inches long, 18 inches wide and 20 inches high. But also after putting in roughly 4 to 6 inches of gravel and sand. Rocks, driftwood and other things the same volume of water will not be there. Also the canister filter and the two Emperors back filters will take some of the water to fill up so determining the water used without counting or putting in conditioner before pouring can be difficult. Do this while putting in water to be sure you are putting in the right amount. If using a filter this is easy.
- After the tank is full:
Now that our tank is full and everything is in place it is time to turn everything on. Put in your thermometer and see that everything is working. After my tank is full and running I plan to keep it this way (with no fish or plants) for one week. You should let the tank run for at least a week before introducing fish to the tank. Things in the tank need to settle. Equipment needs to run before fish are brought into the tank. Take this advice from one who knows about dumping fish into a tank to soon. Re-read my first page again if you need a refresher on why. Gravel will cloud up the water. Driftwood may still leach into the water. These things: cloudy water or brown water will not make our little scaled friends feel at home and will most likely cause a cause of the Ick to occur. Re-read page 1 again. Also you want to check for leaks in the tank and check that equipment is working properly. 75 gallons of water most likely around 60-70 degrees takes time to get up in temp by the heater. You do not want run out buy fish put them in and find out "Dam the heater doesnt work and the pet store is closed" or "The tank has sprung a leak and where am I going to put all these fish I have while I repair the tank. Stressed out fish by putting them in and out will make them sick. Re-read page 1. I can not stress enough reading page 1. This is the whole point of writing this. I want people who do not know about fish keeping as I did to make the same mistakes as I did. It is costly and frustrating. I tried to get info quickly but didnt have the time to look because time was of the essence. There was a lot about fish but not much I could find quickly for the novice like myself to show me what to do and what not to do. Thanks to people like Badman things are much different.
- In closing, on setting up the tank part:
Remember to wait at this point for you to see how everything is working. Make sure the stand is still secure. Make sure the thermometer is turning on and off. Water temp is where you want it for the fish you are going to keep. Get yourself a timer to turn the lights on and off. Remember Tropical Fish are from close to the equator. They are used to seeing light for at least 10-14 hours. Winter or summer this doesnt change much. Temperature will vary depending on the type of fish you want to keep but most are happy with around 76-80 degrees. Do not get excited to be tempted to the dark side Jedi and run and put those fish in. If this is a problem there is much to keep your mind occupied with. Get a test kit to check for Ammonia and Nitrite. Also get test kits for pH levels and a KH and GH test kit. Check the pH level of your water. Check the general hardness of your water. Carbonated hardness of your water. These things will keep you busy and your mind off those little colored beauties with the gills. What to see that the cloudiness and the brown from the wood goes away. Make sure those filters are cycling the water correctly. Also I forgot to mention read all instructions on the equipment you are using. When to clean filter intakes and when to change out the filters. Make yourself ready incase of that Oh sh#t what do I do now thing that may happen. Re-read page 1, lol. Funny but true! In the next section I will talk about putting in the plants and also I think before that I will discuss cycling the tank what kind of fish to used to do this. How many, and the Nitrogen cycle and what is it and why be concerned about it!
- Any questions:
Feel free to E-mail me. I will try my best to answer your questions or give you someone that can. E-mail the Badman as well. He is very helpful and friendly and also he puts up with my big mouth. Has to be an alright person for that! Till the next page
Mags
|